
A postcard can look perfect on screen and still come off the press with a thin white edge if the file is built incorrectly. That is usually where the question starts: what is bleed in printing, and why does a small setup detail make such a big difference in the final piece?
Bleed is the extra image area that extends past the final trim size of a printed piece. It is there to protect the design when the job is cut down to its finished size. Printing and trimming are precise, but they are not infinitely exact. A slight shift during cutting is normal. If a background color, photo, or graphic stops exactly at the trim line, even a minor movement can leave an unwanted white sliver at the edge. Bleed gives the printer a margin for trimming so the finished piece still looks clean.
For business cards, brochures, postcards, flyers, pocket folders, and event handouts, bleed is one of the basic requirements that separates a production-ready file from one that may need correction. If you are working on a rush order for a trade show, direct mail drop, or same-day marketing piece, getting bleed right from the start can save time and avoid rework.
What is bleed in printing and how much do you need?
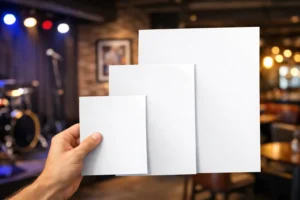
In most commercial printing, the standard bleed is 0.125 inch on each side. That is 1/8 inch beyond the final trim size. If your finished postcard is 4 x 6 inches, the file with bleed should usually be built at 4.25 x 6.25 inches.
That extra area does not mean the printed piece will be larger when delivered. It only means the artwork extends beyond the cut line. After printing, the sheet is trimmed down to the final size.
Some products may call for different setup requirements. Large-format graphics, banners, packaging pieces, and specialty die-cut items can use different bleed standards depending on the material, finishing method, and equipment. That is why it helps to confirm specs before sending artwork, especially on custom jobs.
Why bleed matters more than most people expect
Bleed exists because paper moves, presses move, and cutters have tolerances. Even in a well-run production environment, tiny shifts happen. On many jobs, those shifts are small enough that customers never notice. But if your design ends exactly at the trim edge, a tiny shift becomes visible right away.
This matters most when your layout uses full-bleed color. A dark navy background, a photo that runs edge to edge, or a bold red block across the whole postcard all need bleed. Without it, the trim has no room for movement.
It also matters for brand presentation. If you are handing out business cards at a convention, mailing promotional postcards, or placing brochures in a hotel lobby, uneven edges make the piece look less polished. Most businesses are not trying to be perfectionists for the sake of it. They just want their printed materials to look professional, consistent, and ready to represent the brand.
Bleed vs trim vs safe area
These three terms are often grouped together, and they should be understood together.
Bleed is the artwork that extends beyond the final cut size. The trim line is where the piece is intended to be cut. The safe area is the space inside the trim where important content should stay.
That safe area matters just as much as bleed. Even if the background extends properly, text and logos placed too close to the edge can end up looking crowded or slightly off-center after trimming. As a practical rule, keep important elements at least 0.125 inch inside the trim, and often a little more when possible.
If you picture a flyer as three zones, it becomes easier to set up. The outside zone is bleed and gets cut away. The middle boundary is the trim line. The inside zone is where your headline, logo, phone number, QR code, or event details should live.
Common products that need bleed
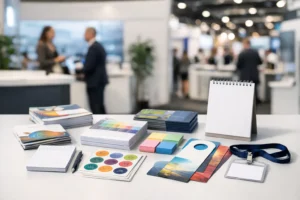
Any printed piece with color, images, or design elements that touch the edge needs bleed. That includes business cards, postcards, brochures, presentation folders, rack cards, stickers, booklets, posters, and many direct mail pieces.
Wide-format products can need bleed too, but the setup can vary. A poster may require bleed if it will be trimmed after printing. A banner may not use bleed in the same way if hems or finishing affect the final size differently. Trade show graphics often come with very specific templates because visible areas, panel wraps, and hardware constraints all matter.
This is where file prep becomes product-specific. A standard flyer and a retractable banner are both printed graphics, but they are not built the same way.
What happens if a file has no bleed?
Sometimes the result is obvious: thin white edges where color should have gone to the end. Other times the issue is subtler. A design may need to be enlarged slightly to create artificial bleed, which can shift the composition. Text might end up closer to the edge than intended. A border may look uneven because trim movement becomes visible on all four sides.
On rush jobs, missing bleed can also slow production. A printer may need to contact you for corrected files, make adjustments that are not ideal, or flag the job before it can move forward. If your deadline is tied to an event opening, sales meeting, or convention booth setup, that delay matters.
There are cases where a file without bleed can still print acceptably. If the design has white margins and nothing touches the edge, bleed may not be necessary. That is the main exception. The need for bleed depends on the layout, not just the product.
How to set up bleed correctly
The best time to add bleed is when the file is first built. Most professional design programs let you define bleed in the document setup. Once that is in place, extend background colors, photos, and graphic elements all the way to the bleed line.
Do not stop edge-to-edge artwork at the trim line. That is the mistake that creates trouble later.
At the same time, keep important content away from the edge. A logo that sits too close to trim may technically fit, but it can still look off once the piece is cut. Clean spacing usually produces a better result than pushing content outward just to fill the page.
When exporting a print-ready PDF, make sure bleed and crop marks are included if requested. Not every workflow requires marks, but bleed is usually essential when the design runs to the edge.
What is bleed in printing for custom and rush jobs?
For standard business cards and flyers, bleed is straightforward. For custom sizes, packaging, die cuts, and convention graphics, the answer can be more specific.
A custom presentation folder may need bleed around the outer shape, but the pockets, score lines, and glue areas also affect where artwork should go. A trade show panel may need bleed beyond the visible face because some of the print wraps around the frame. A sticker sheet may have both outer bleed and cut-line considerations. In those situations, a template matters more than general rules.
Rush production adds another layer. When a job needs to move fast, there is less room for file corrections. A properly prepared file helps the job move into production with fewer questions and fewer delays. For companies ordering under deadline, that is not a minor benefit. It can be the difference between having materials in hand before setup time or scrambling for a backup plan.
A quick way to think about bleed
If the design touches the edge, extend it past the edge.
That simple rule covers most cases. If you want white space around the outside of the piece, bleed may not be needed. If you want color, photos, patterns, or shapes to run all the way off the page, bleed is part of the file setup.
For many buyers, bleed sounds technical until they see why it matters. It is not an advanced print trick. It is a basic production safeguard that helps the finished piece look intentional.
At Design One Printing, we see this most often with postcards, flyers, business cards, and event materials ordered on tight timelines. The files that move fastest are usually the ones built with trim, safe area, and bleed in mind from the beginning.
If you are ever unsure, ask before the job goes to press. A quick file check is easier than fixing a printed piece after the fact, especially when the deadline is already close.