
Miss one detail on a booth graphic, and it shows up fast – blurry text, off-brand color, a banner that curls at the corners, or a panel that does not fit the hardware you brought to the convention hall. If you are figuring out how to print trade show graphics, the goal is not just getting something printed. It is getting graphics that install cleanly, hold up under event conditions, and make your brand look prepared.
Trade show printing has less room for error than standard marketing collateral. Booth graphics are large, viewed from different distances, and often produced against hard deadlines. That means your artwork, materials, finishing, and production timing all need to line up before the job goes to press.
How to print trade show graphics without costly reprints
The first step is knowing exactly what you are printing for. A retractable banner, back wall display, mounted sign, table throw, window graphic, floor decal, and hanging sign all have different production requirements. Before you send files anywhere, confirm the display type, visible size, bleed requirements, and whether the graphic will be used once or across multiple events.
That sounds basic, but this is where many expensive mistakes start. The hardware dimensions listed by a manufacturer are not always the same as the final visible area. Some systems hide a portion of the graphic inside the stand or frame. Others need extra allowance for hems, pole pockets, or panel overlap. If your artwork is built to the wrong size, you can end up reprinting the entire piece.
For exhibitors working in Las Vegas, timing matters just as much as design. Convention schedules shift, freight gets delayed, and last-minute booth changes are common. That is why it helps to work backward from install day, not from the day you want to place the order. Leave room for proofing, production, trimming, finishing, and any corrections if needed.
Start with the right file setup
Large-format graphics only look easy from across the room. Up close, quality depends on how the file was prepared.
Build your artwork to the printer’s requested scale and resolution. Full size is not always necessary, especially for oversized displays, but the scale must be accurate. Raster images should have enough effective resolution at final print size. If a photo looks fine on your laptop but only has web resolution, it will not hold up on an 8-foot backdrop.
Keep text and logos in vector format when possible. Vector artwork stays crisp at large sizes and gives cleaner output than flattened low-resolution files. This is especially important for booth headers, brand marks, QR codes, and pricing or product callouts.
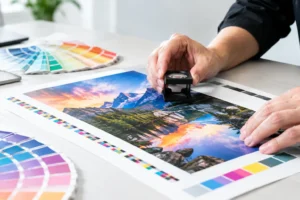
Color mode matters too. Most commercial print production is built around CMYK output, and some bright RGB colors simply cannot be reproduced the same way in print. If your brand depends on a very specific color, say that upfront. Sometimes a close process match is fine. Other times, color expectations need to be managed before production starts.
Just as important is the safe area. Keep key text, logos, and faces away from edges, grommets, hems, and folds. A booth graphic may technically print correctly and still fail visually if the important content lands too close to a trim line or gets blocked by hardware.
Choose materials based on use, not just price
If you want to know how to print trade show graphics well, material selection is where the practical decisions happen. The least expensive substrate is not always the best fit, especially if the display has to survive shipping, repeated setup, or long exhibit hours under strong lighting.
Vinyl banners work well for many booth applications because they are durable and cost-effective. They are a solid choice for temporary signage, step-and-repeat displays, and promotional messaging where flexibility matters. The trade-off is that some vinyl materials can show curl or reflect light more than fabric.
Fabric graphics often present a cleaner, more upscale look, especially for backdrops and tension displays. They travel well, reduce glare, and can look better under convention center lighting. But fabric is not right for every application. Some uses require more rigidity or a different finishing method.
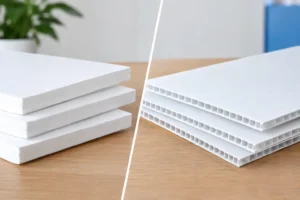
Rigid boards, foam board, PVC, acrylic, or other mounted materials are useful for easel signs, product messaging, directional signage, and branded panels. The question is not whether a rigid sign looks professional – it usually does. The question is whether it can be transported safely and whether the venue setup supports it.
Laminates and protective coatings also depend on use. If the graphic will be handled repeatedly, installed outdoors, or exposed to scuffing, extra protection may be worth it. For a one-time indoor event, it may not be necessary.
Size for visibility, not just fit
One common mistake is designing booth graphics as if attendees will stand three feet away and read every line. In reality, people are moving, scanning, and making quick decisions. Your graphics need to communicate fast.
Think in layers. The largest message should be readable from aisle distance. Your brand name, category, or primary value statement should be obvious at a glance. Secondary details can support the message once someone gets closer. Smaller text belongs on handouts, brochures, or counter cards, not on the main backdrop.
Images should also match the scale of the display. A small image stretched across a full wall usually looks weak, even if the file technically passes. Strong trade show graphics use bold visuals, clean hierarchy, and enough open space to avoid looking crowded.
This is where print and design should work together. A layout that looks sharp on screen can still feel cluttered when enlarged. If the booth already includes product shelves, monitors, lighting, and furniture, the graphic does not need to carry every piece of information.
Proof before production
Rushed jobs are part of event printing, but skipping proof review is where rush orders turn into avoidable problems.
Always confirm dimensions, placement, colors, spelling, and finishing details before production starts. If the job includes multiple panels, check panel order and continuity across seams. If the graphic fits existing hardware, verify the exact template and visible area one more time.
This is also the moment to catch practical issues. Is the QR code large enough to scan? Is the phone number readable from a few feet away? Are important elements hidden behind a podium or table? Those questions are easier to fix in a proof than after the crate arrives at the show.
For high-stakes event work, responsive communication matters. A good production partner will ask the right questions early, flag file issues, and help prevent mistakes that do not become obvious until setup day.
Plan for finishing, packing, and install
Printing is only part of the job. Trade show graphics also need to be finished correctly and delivered in a way that supports installation.
A banner may need grommets, pole pockets, reinforced hems, or stand-compatible trimming. A fabric display may need silicone edging. Mounted signs may need easel backs, hardware holes, or clean edge finishing. If those details are not addressed upfront, the graphic can arrive printed well but unusable in the booth.
Packing matters too. Large-format pieces can crease, dent, or scratch in transit. If the materials are traveling to a hotel, convention center, or advance warehouse, label the job clearly and allow time for delivery handling. Last-minute exhibitors often focus on print speed and forget the logistics around receiving and setup.
If you are printing close to show date, local production can make a major difference. Being able to approve a proof quickly, confirm specs with a real team, and arrange pickup near the convention area reduces risk. For exhibitors with compressed timelines, that reliability matters as much as the print itself.
Work backward from the event date
The best answer to how to print trade show graphics is simple: earlier is better, but accurate is better than early and wrong.
A realistic production schedule should include file preparation, proof approval, printing, finishing, packaging, and delivery or pickup. If your booth includes more than one item, such as a backdrop, banners, table cover, posters, and handouts, coordinate them as one project rather than placing separate orders at different times.
If your schedule is tight, be upfront about it. A fast-turnaround print partner can often help prioritize the job, suggest alternate materials, or identify what can still be produced in time. Design One Printing works with businesses and exhibitors in exactly these situations, especially when convention deadlines move faster than expected.
Trade show graphics do their job before your team says a word. When they are printed correctly, they create a strong first impression, support your message, and help your booth feel organized from the start. If you plan the file setup, materials, sizing, and turnaround with care, your graphics will not just arrive on time – they will look like they belong in the room.